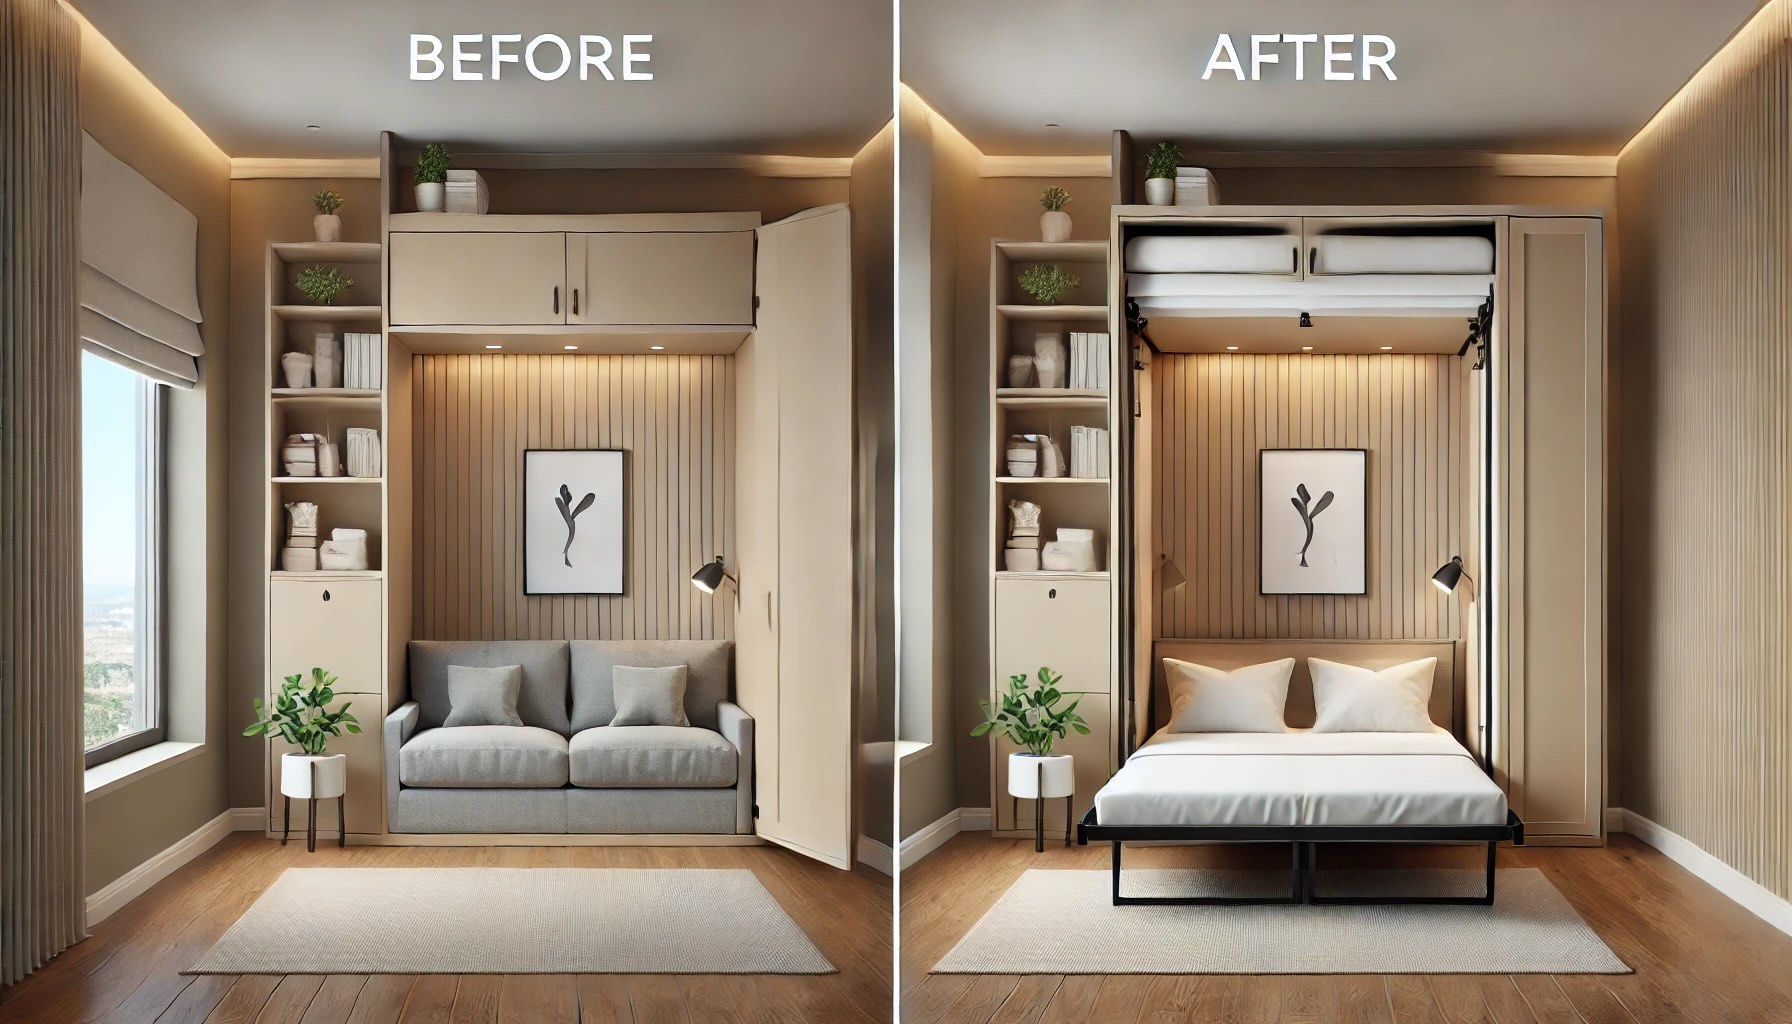
Murphy beds, also known as wall beds, are the ultimate space-saving solution for small homes, guest rooms, or multipurpose spaces. Whether you’re a DIY enthusiast or a homeowner looking to add functionality without sacrificing style, building a Murphy bed can be a rewarding project. In this guide, we’ll walk you through the process of constructing a sturdy, safe, and stylish Murphy bed, while addressing common challenges and professional tips to ensure success.
Why Build a Murphy Bed?
Murphy beds have surged in popularity due to their ability to transform cluttered rooms into functional living areas. Unlike traditional beds, they fold vertically against the wall, freeing up floor space for work, exercise, or entertainment. For those wondering what is better than a Murphy bed, alternatives like sofa beds or loft beds exist, but they often compromise comfort or aesthetics. A well-built Murphy bed, however, combines practicality with seamless design.
Tools and Materials You’ll Need
Before diving into construction, gather these essentials:
Tools:
- Circular saw or table saw
- Drill/driver
- Kreg jig (for pocket holes)
- Clamps
- Level
- Measuring tape
- Sandpaper or orbital sander
Materials:
- ¾-inch plywood (for the bed frame and cabinet)
- 2×4 lumber (for structural support)
- Murphy bed hardware kit (pistons, hinges, locking mechanism)
- Wood screws, wood glue, and finishing nails
- Paint or stain (optional)
- Mattress (typically twin, full, or queen size)
Pro Tip: If you’re not confident in your woodworking skills, consult a cabinet maker for precision cuts or complex joinery.

Step 1: Design and Measurements
Every successful Murphy bed build starts with a solid plan. Decide on the bed size (e.g., queen or full) and the cabinet’s dimensions. Most Murphy beds require a cabinet depth of 12–18 inches to accommodate the mattress and hardware.
Key Measurements:
- Mattress thickness: Ensure the cabinet depth exceeds the mattress thickness by 1–2 inches.
- Wall studs: Locate studs to anchor the bed securely. Use a stud finder for accuracy.
- Clearance: Allow 3–4 feet of floor space for the bed to fold down safely.
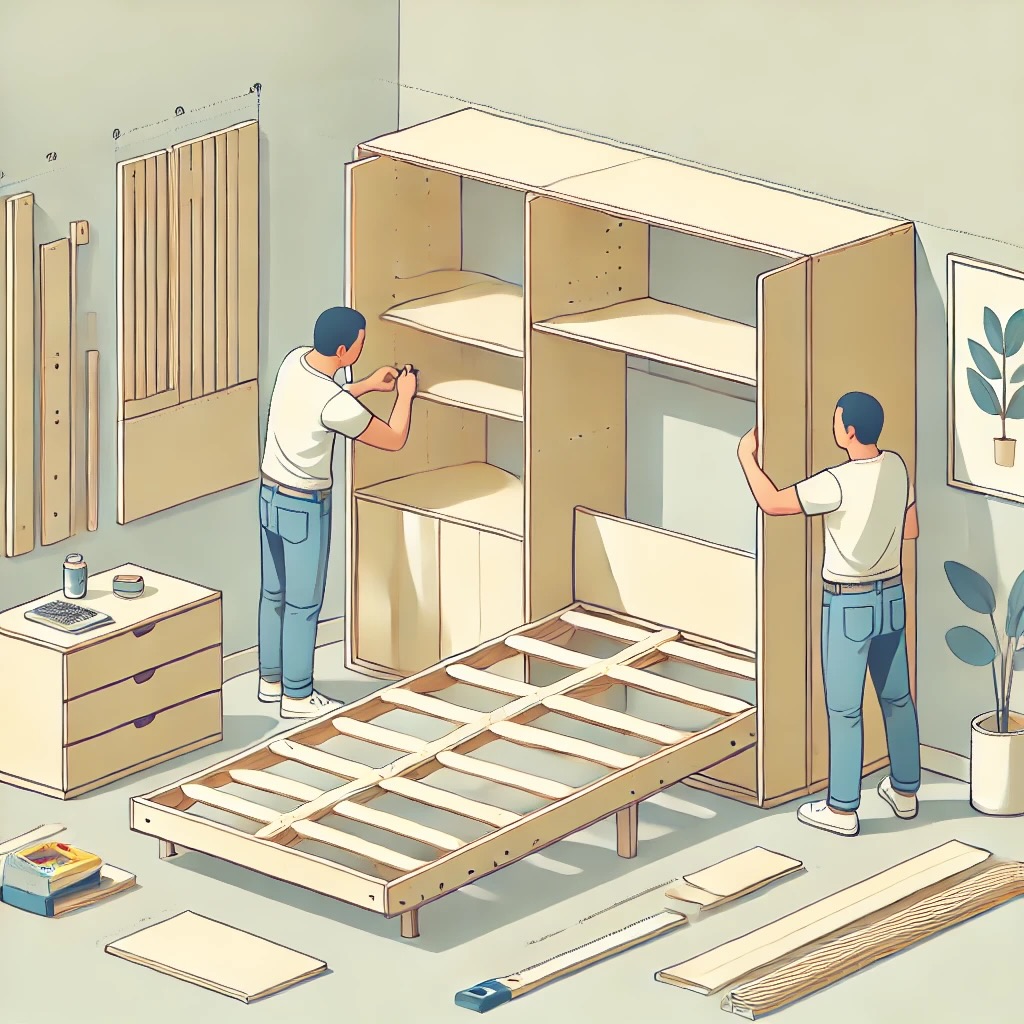
Step 2: Build the Bed Frame
The bed frame must support the mattress and withstand repeated use.
- Cut the Panels: Use plywood to create the bed platform, side rails, and header/footer boards.
- Assemble the Frame: Attach side rails to the platform using pocket screws for strength. Reinforce joints with wood glue.
- Install Cross Supports: Add 2×4 braces across the frame to prevent sagging.
Safety Note: Always test the frame’s stability before attaching hardware.
Step 3: Install the Murphy Bed Hardware
The hardware kit is the backbone of your Murphy bed build. Follow the manufacturer’s instructions carefully.
- Mount the Pistons: These gas springs assist in lifting the bed. Attach them to the bed frame and cabinet.
- Secure Hinges: Heavy-duty hinges connect the bed frame to the cabinet.
- Add a Locking Mechanism: This prevents accidental opening.
Pro Tip: Opt for a commercial-grade hardware kit—cheaper alternatives may compromise safety.
Step 4: Construct the Cabinet
The cabinet houses the bed and blends into your room’s decor.
- Build the Box: Assemble plywood panels into a rectangular box, leaving the front open.
- Attach to Wall: Secure the cabinet to wall studs using lag bolts.
- Add Finishing Touches: Install trim, doors, or shelves for a polished look.
Design Idea: Integrate built-in shelves or a desk to maximize functionality.
Step 5: Test and Finish
Before declaring your project complete:
- Test the bed’s motion multiple times to ensure smooth operation.
- Sand rough edges and apply paint or stain.
- Secure loose screws and inspect all connections.
FAQ Section
1. Is it cheaper to build a Murphy bed?
Yes, building a Murphy bed yourself can save 30–50% compared to buying a pre-made unit. Costs vary based on materials and hardware quality, but a DIY build typically ranges from 500–1,500, whereas retail models start around $2,000.
2. Are Murphy beds easy to build?
They require intermediate woodworking skills. While the process is straightforward with a detailed plan, tasks like aligning hardware and securing the cabinet to wall studs demand precision. Beginners may want to partner with a cabinet maker for complex steps.
3. Can I DIY a Murphy bed?
Absolutely! With the right tools, materials, and patience, a DIY Murphy bed is achievable. Follow a reliable blueprint and prioritize safety—especially when installing heavy components.
4. What is the difference between a wall bed and a Murphy bed?
The terms are often used interchangeably, but “Murphy bed” refers specifically to beds with patented vertical folding mechanisms. “Wall bed” is a broader term that includes horizontal or custom folding designs.
Final Thoughts
Building a Murphy bed is a practical investment for small spaces, offering comfort without clutter. While the project requires effort, the result—a custom, space-saving bed—is well worth it. For those unsure about tackling the build alone, collaborating with a professional cabinet maker ensures a flawless finish.
Whether you’re crafting a guest room or a home office, a Murphy bed proves that smart design can transform any room into a versatile sanctuary.